我的书签
我的书签
 添加书签
添加书签 移除书签
移除书签- 十六、实时图表
十六、实时图表
在这篇 Matplotlib 教程中,我们将介绍如何创建实时更新图表,可以在数据源更新时更新其图表。 你可能希望将此用于绘制股票实时定价数据,或者可以将传感器连接到计算机,并且显示传感器实时数据。 为此,我们使用 Matplotlib 的动画功能。
最开始:
import matplotlib.pyplot as pltimport matplotlib.animation as animationfrom matplotlib import style
这里,唯一的新增导入是matplotlib.animation as animation。 这是一个模块,允许我们在显示之后对图形进行动画处理。
接下来,我们添加一些你熟悉的代码,如果你一直关注这个系列:
style.use('fivethirtyeight')fig = plt.figure()ax1 = fig.add_subplot(1,1,1)
现在我们编写动画函数:
def animate(i):graph_data = open('example.txt','r').read()lines = graph_data.split('\n')xs = []ys = []for line in lines:if len(line) > 1:x, y = line.split(',')xs.append(x)ys.append(y)ax1.clear()ax1.plot(xs, ys)
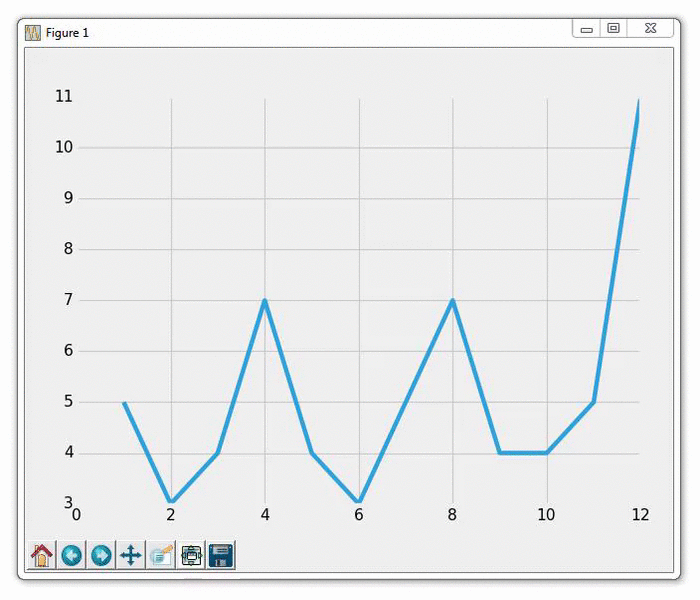
我们在这里做的是构建数据,然后绘制它。 注意我们这里不调用plt.show()。 我们从一个示例文件读取数据,其内容如下:
1,52,33,44,75,46,37,58,79,410,4
我们打开上面的文件,然后存储每一行,用逗号分割成xs和ys,我们将要绘制它。 然后:
ani = animation.FuncAnimation(fig, animate, interval=1000)plt.show()
我们运行动画,将动画放到图表中(fig),运行animate的动画函数,最后我们设置了 1000 的间隔,即 1000 毫秒或 1 秒。
运行此图表的结果应该像往常一样生成图表。 然后,你应该能够使用新的坐标更新example.txt文件。 这样做会生成一个自动更新的图表,如下: