 我的书签
我的书签
 添加书签
添加书签 移除书签
移除书签- Istio 教程
- 准备环境
- 安装 Kubernetes
- 安装 Istio
- 部署示例应用
- 本地运行
- 启动 Jaeger
- Customer
- Preference
- Recommendation
- Jaeger
- 构建镜像
- Customer
- Preference
- Recommendation
- 部署到 Kubernetes
- 增加 Ingress 配置
- 本地运行
- Istio 使用示例
- 构建 recommendation:v2
- 修改 Istio RouteRules
- 故障注入
- 增加延迟
- 重试
- 超时
- 基于 user-agent 的智能路由(金丝雀发布)
- 镜像流量
- 访问控制
- 白名单
- 黑名单
- 负载均衡
- 速率限制
- 断路器
- Pool Ejection
- Egress
- 参考
Istio 教程
注意:本文档已失效,请浏览 Istio 官方文档。本书中的 Service Mesh 章节已不再维护,请转到 istio-handbook 中浏览。
本文是 Istio 管理 Java 微服务的案例教程,使用的所有工具和软件全部基于开源方案,替换了 redhat-developer-demos/istio-tutorial 中的 minishift 环境,使用 kubernetes-vagrant-centos-cluster 替代,沿用了原有的微服务示例,使用 Zipkin 做分布式追踪而不是 Jaeger。
本文中的代码和 YAML 文件见 https://github.com/rootsongjc/istio-tutorial。
注意:本教程基于 Istio 0.7.1,2018年8月1日,Isito 1.0 发布,本教程已过时。
准备环境
在进行本教程前需要先准备以下工具和环境。
- 8G 以上内存
- Vagrant 2.0+
- Virtualbox 5.0 +
- 提前下载 kubernetes1.9.1 的 release 压缩包
- docker 1.12+
- kubectl 1.9.1+
- maven 3.5.2+
- istioctl 0.7.1
- git
- curl、gzip、tar
- kubetail
- siege
安装 Kubernetes
请参考 kubernetes-vagrant-centos-cluster 在本地启动拥有三个节点的 kubernetes 集群。
git clone https://github.com/rootsongjc/kubernetes-vagrant-centos-cluster.gitcd kubernetes-vagrant-centos-clustervagrant up
安装 Istio
在 kubernetes-vagrant-centos-cluster 中的包含 Istio 0.7.1 的安装 YAML 文件,运行下面的命令安装 Istio。
kubectl apply -f addon/istio/
运行示例
kubectl apply -n default -f <(istioctl kube-inject -f yaml/istio-bookinfo/bookinfo.yaml)
在您自己的本地主机的/etc/hosts文件中增加如下配置项。
172.17.8.102 grafana.istio.jimmysong.io172.17.8.102 servicegraph.istio.jimmysong.io172.17.8.102 zipkin.istio.jimmysong.io
我们可以通过下面的URL地址访问以上的服务。
| Service | URL |
|---|---|
| grafana | http://grafana.istio.jimmysong.io |
| servicegraph | http://servicegraph.istio.jimmysong.io/dotviz,http://servicegraph.istio.jimmysong.io/graph |
| zipkin | http://zipkin.istio.jimmysong.io |
详细信息请参阅 https://istio.io/docs/guides/bookinfo.html
部署示例应用
在打包成镜像部署到 kubernetes 集群上运行之前,我们先在本地运行所有示例。
本教程中三个服务之间的依赖关系如下:
customer → preference → recommendation
customer 和 preference 微服务是基于 Spring Boot 构建的,recommendation 微服务是基于 vert.x 构建的。
customer 和 preference 微服务的 pom.xml 文件中都引入了 OpenTracing 和 Jeager 的依赖。
<dependency><groupId>io.opentracing.contrib</groupId><artifactId>opentracing-spring-cloud-starter</artifactId><version>0.1.7</version></dependency><dependency><groupId>com.uber.jaeger</groupId><artifactId>jaeger-tracerresolver</artifactId><version>0.25.0</version></dependency>
本地运行
我们首先在本地确定所有的微服务都可以正常运行,然后再打包镜像在 kubernetes 集群上运行。
启动 Jaeger
使用 docker 来运行 jagger。
docker run -d \--rm \-p5775:5775/udp \-p6831:6831/udp \-p6832:6832/udp \-p16686:16686 \-p14268:14268 \jaegertracing/all-in-one:1.3
Jaeger UI 地址 http://localhost:16686
Customer
cd customer/java/springbootJAEGER_SERVICE_NAME=customer mvn \spring-boot:run \-Drun.arguments="--spring.config.location=src/main/resources/application-local.properties"
服务访问地址: http://localhost:8280
Preference
cd preference/java/springbootJAEGER_SERVICE_NAME=preference mvn \spring-boot:run \-Drun.arguments="--spring.config.location=src/main/resources/application-local.properties"
服务访问地址:http://localhost:8180
Recommendation
cd recommendation/java/vertxmvn vertx:run
服务访问地址:http://localhost:8080
所有服务都启动之后,此时访问 http://localhost:8280 将会看到如下输出。
customer => preference => recommendation v1 from 'unknown': 1
每访问一次最后的数字就会加 1。
Jaeger
此时访问 http://localhost:16686 将看到 Jaeger query UI,所有应用将 metrics 发送到 Jeager 中。
可以在 Jaeger UI 中搜索 customer 和 preference service 的 trace 并查看每次请求的 tracing。

构建镜像
在本地运行测试无误之后就可以构建镜像了。本教程中的容器镜像都是在 fabric8/java-jboss-openjdk8-jdk 的基础上构建的。只要将 Java 应用构建出 Jar 包然后放到 /deployments 目录下基础镜像就可以自动帮我们运行,所以我们看到着几个应用的 Dockerfile 文件中都没有执行入口,真正的执行入口是 run-java.sh。
Customer
构建 Customer 镜像。
cd customer/java/springbootmvn clean packagedocker build -t jimmysong/istio-tutorial-customer:v1 .docker push jimmysong/istio-tutorial-customer:v1
第一次构建和上传需要花费一点时间,下一次构建就会很快。
Preference
构建 Preference 镜像。
cd preference/java/springbootmvn clean packagedocker build -t jimmysong/istio-tutorial-preference:v1 .docker push jimmysong/istio-tutorial-preference:v1
Recommendation
构建 Recommendation 镜像。
cd recommendation/java/vertxmvn clean packagedocker build -t jimmysong/istio-tutorial-recommendation:v1 .docker push jimmysong/istio-tutorial-recommendation:v1
现在三个 docker 镜像都构建完成了,我们检查一下。
$ docker images | grep istio-tutorialREPOSITORY TAG IMAGE ID CREATED SIZEjimmysong/istio-tutorial-recommendation v1 d31dd858c300 51 seconds ago 443MBjimmysong/istio-tutorial-preference v1 e5f0be361477 6 minutes ago 459MBjimmysong/istio-tutorial-customer v1 d9601692673e 13 minutes ago 459MB
部署到 Kubernetes
使用下面的命令将以上服务部署到 kubernetes。
# create new namespacekubectl create ns istio-tutorial# deploy recommendationkubectl apply -f <(istioctl kube-inject -f recommendation/kubernetes/Deployment.yml) -n istio-tutorialkubectl apply -f recommendation/kubernetes/Service.yml# deploy preferrencekubectl apply -f <(istioctl kube-inject -f preference/kubernetes/Deployment.yml) -n istio-tutorialkubectl apply -f preference/kubernetes/Service.yml# deploy customerkubectl apply -f <(istioctl kube-inject -f customer/kubernetes/Deployment.yml) -n istio-tutorialkubectl apply -f customer/kubernetes/Service.yml
注意:preference 和 customer 应用启动速度比较慢,我们将 livenessProb 配置中的 initialDelaySeconds 设置为 20 秒。
查看 Pod 启动状态:
kubectl get pod -w -n istio-tutorial
增加 Ingress 配置
为了在 kubernetes 集群外部访问 customer 服务,我们需要增加 ingress 配置。
kubectl apply -f ingress/ingress.yaml
修改本地的 /etc/hosts 文件,增加一条配置。
172.17.8.102 customer.istio-tutorial.jimmysong.io
现在访问 http://customer.istio-tutorial.jimmysong.io 将看到如下输出:
customer => preference => recommendation v1 from '6fc97476f8-m2ntp': 1
批量访问该地址。
./bin/poll_customer.sh
访问 http://servicegraph.istio.jimmysong.io/dotviz 查看服务的分布式追踪和依赖关系。


访问 http://servicegraph.istio.jimmysong.io/dotviz 查看服务间的关系图和 QPS。

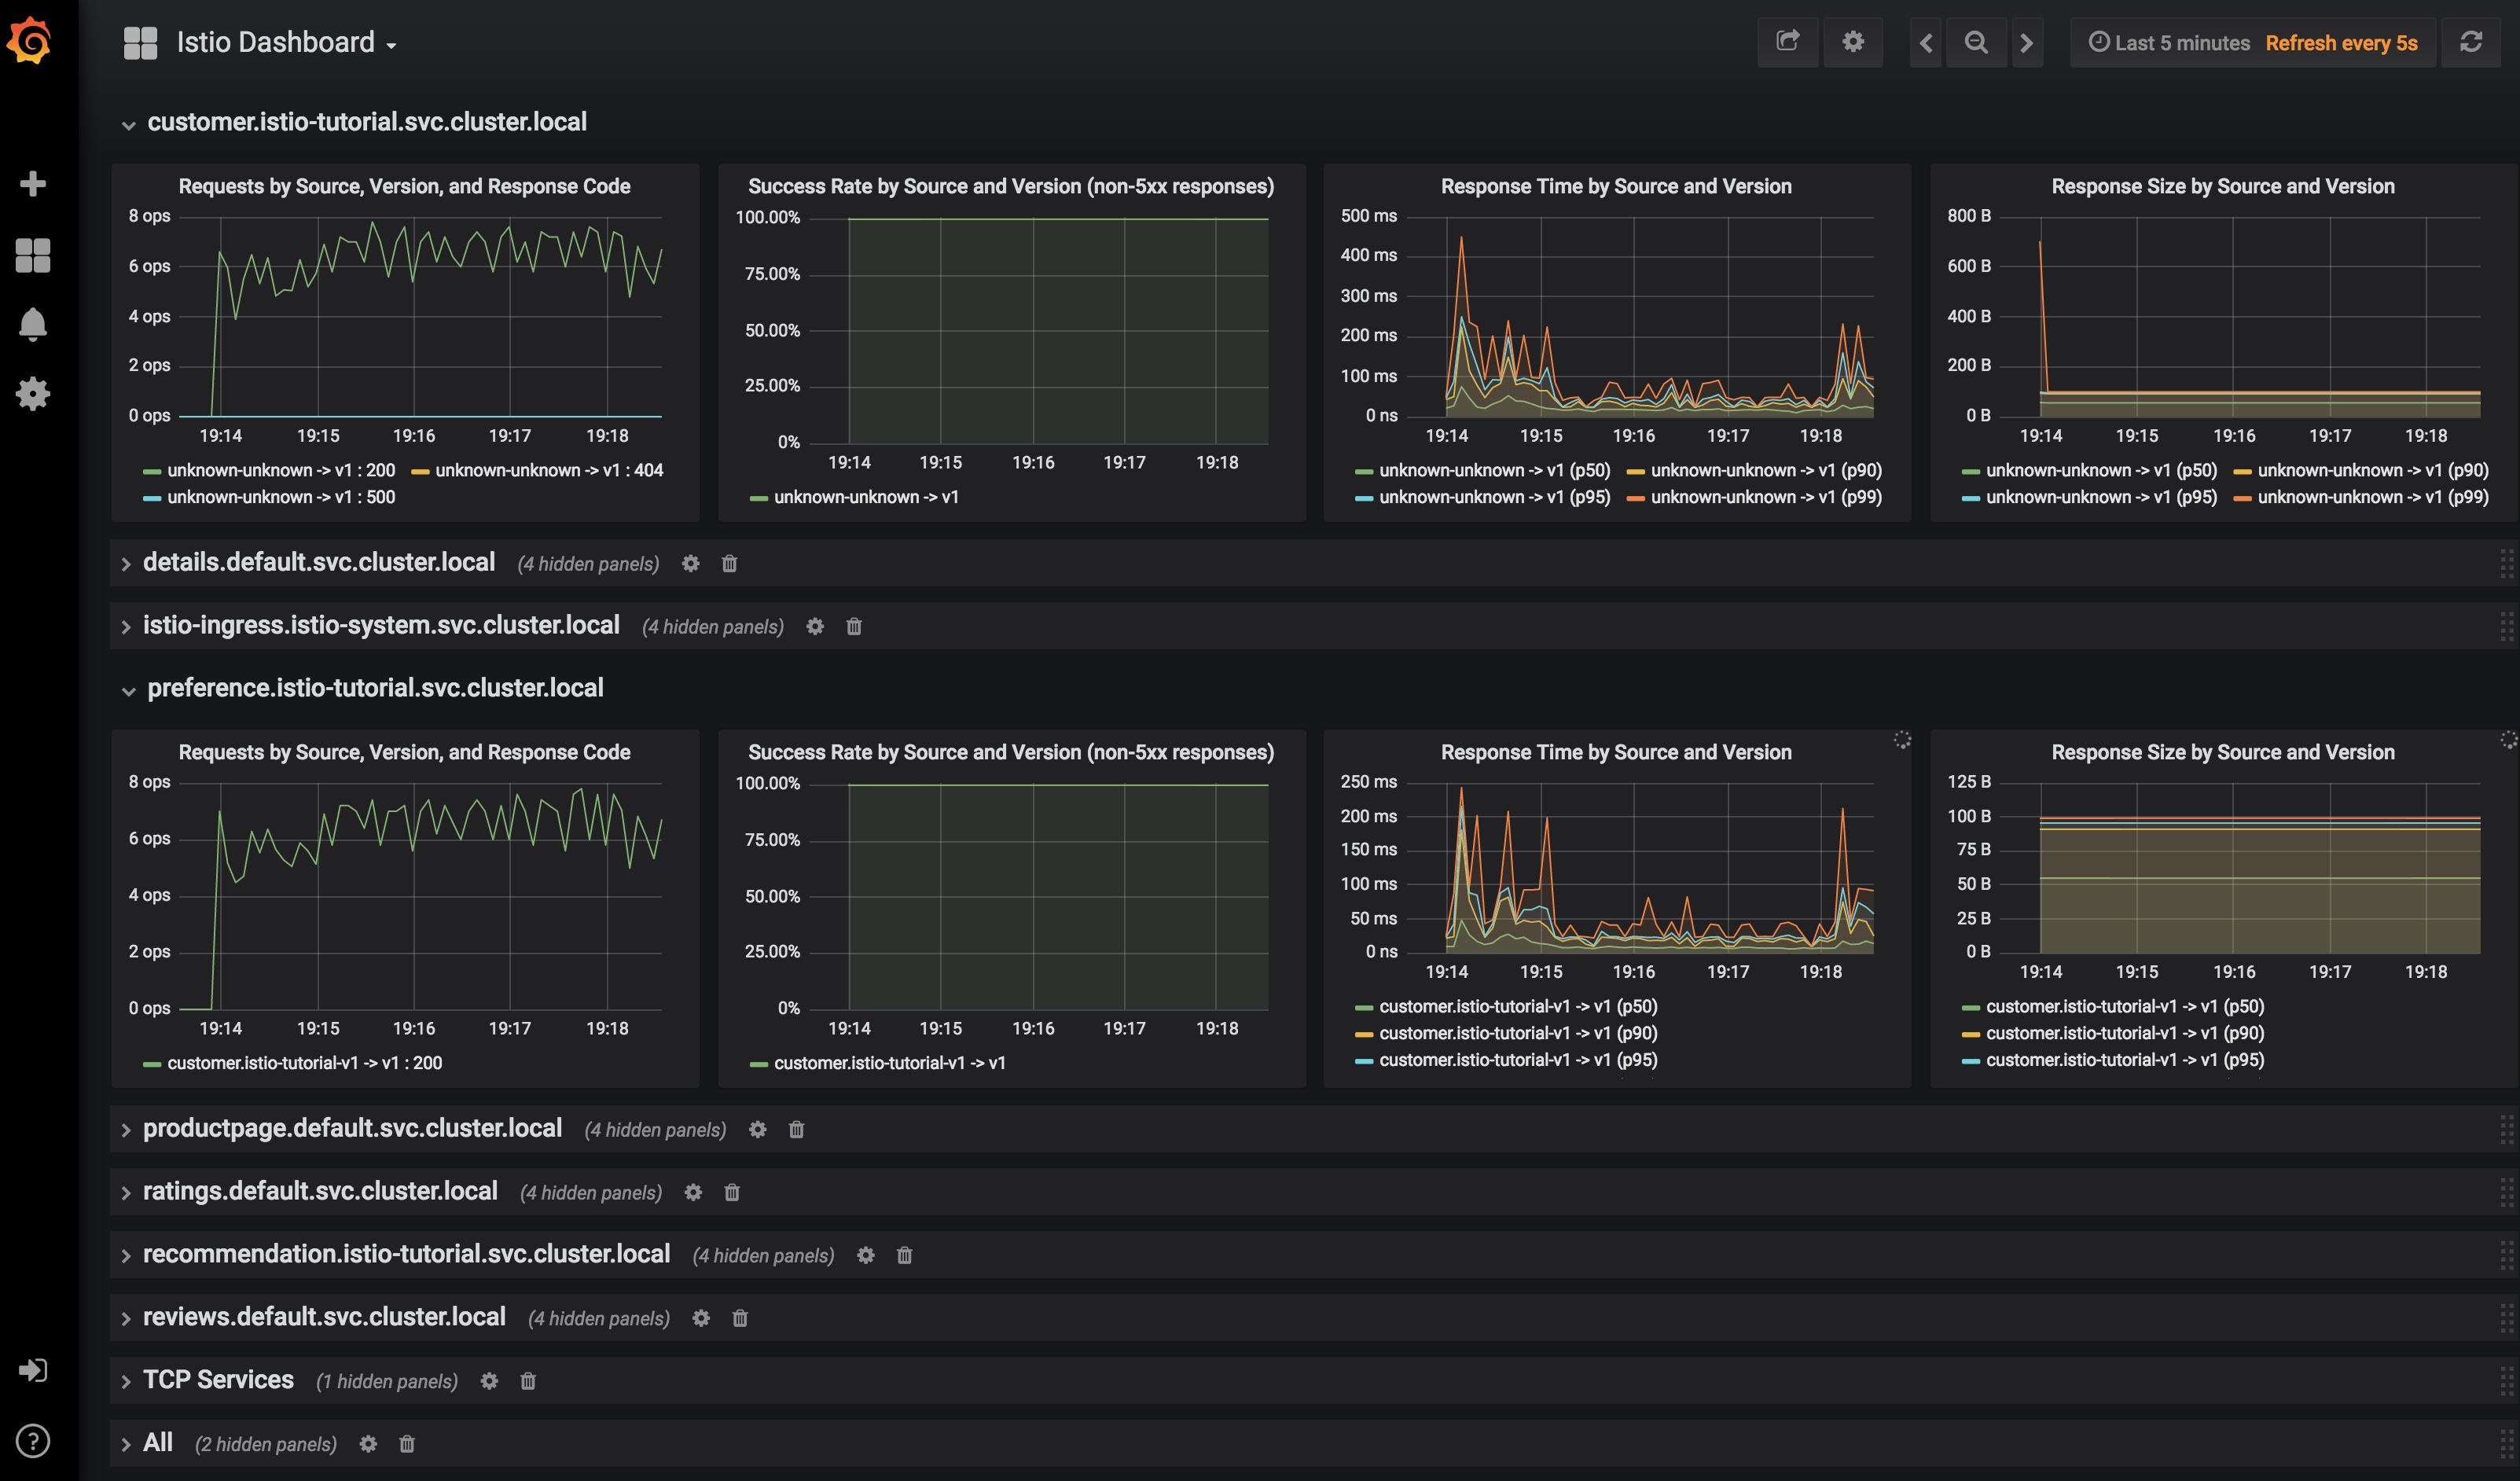
访问 http://grafana.istio.jimmysong.io 查看 Service Mesh 的监控信息。
Istio 使用示例
为了试用 Istio 中的各种功能,我们需要为应用构建多个版本,我们为 recommendation 构建 v2 版本的镜像,看看如何使用 Istio 控制微服务的流量。
构建 recommendation:v2
我们将构建新版的 recommendation 服务的镜像,并观察 customer 对不同版本的 recommendataion 服务的访问频率。
修改 recommendation/java/vertx/src/main/java/com/redhat/developer/demos/recommendation/RecommendationVerticle.java 程序中代码。
将 private static final String RESPONSE_STRING_FORMAT = "recommendation v1 from '%s': %d\n"; 修改为 private static final String RESPONSE_STRING_FORMAT = "recommendation v2 from '%s': %d\n";
并构建 recommendation:v2 镜像。
cd recommendation/java/vertxmvn clean packagedocker build -t jimmysong/istio-tutorial-recommendation:v2 .docker push jimmysong/istio-tutorial-recommendation:v2
将应用部署到 kubernetes。
# deploy recommendationkubectl apply -f <(istioctl kube-inject -f recommendation/kubernetes/Deployment-v2.yml) -n istio-tutorial
现在再访问 customer 服务,将看到如下输出:
$ bin/poll_customer.shcustomer => preference => recommendation v2 from '77b9f6cc68-5xs27': 1customer => preference => recommendation v1 from '6fc97476f8-m2ntp': 3581customer => preference => recommendation v2 from '77b9f6cc68-5xs27': 2customer => preference => recommendation v1 from '6fc97476f8-m2ntp': 3582customer => preference => recommendation v2 from '77b9f6cc68-5xs27': 3customer => preference => recommendation v1 from '6fc97476f8-m2ntp': 3583customer => preference => recommendation v2 from '77b9f6cc68-5xs27': 4
我们可以看到 v1 和 v2 版本的 recommendation 服务会被间隔访问到。
我们再将 v2 版本的 recommendation 实例数设置成 2 个。
kubectl scale --replicas=2 deployment/recommendation-v2 -n istio-tutorialkubectl get pod -w -n istio-tutorial
观察 recommendation-v2 Pod 达到两个之后再访问 customer 服务。
$ bin/poll_customer.shcustomer => preference => recommendation v2 from '77b9f6cc68-j9fgj': 1customer => preference => recommendation v2 from '77b9f6cc68-5xs27': 71customer => preference => recommendation v1 from '6fc97476f8-m2ntp': 3651customer => preference => recommendation v2 from '77b9f6cc68-j9fgj': 2customer => preference => recommendation v2 from '77b9f6cc68-5xs27': 72customer => preference => recommendation v1 from '6fc97476f8-m2ntp': 3652customer => preference => recommendation v2 from '77b9f6cc68-j9fgj': 3customer => preference => recommendation v2 from '77b9f6cc68-5xs27': 73customer => preference => recommendation v1 from '6fc97476f8-m2ntp': 3653
观察输出中 v1 和 v2 版本 recommendation 的访问频率。
将 recommendataion 服务的实例数恢复为 1。
kubectl scale --replicas=1 deployment/recommendation-v2
修改 Istio RouteRules
以下所有路有规则都是针对 recommendation 服务,并在 repo 的根目录下执行。
将所有流量打给 v2
下面将演示如何动态的划分不同版本服务间的流量,将所有的流量都打到 recommendation:v2。
istioctl create -f istiofiles/route-rule-recommendation-v2.yml -n istio-tutorial
现在再访问 customer 服务将看到所有的流量都会打到 recommendation:v2。
删除 RouteRules 后再访问 customer 服务将看到又恢复了 v1 和 v2 版本的 recommendation 服务的间隔访问。
istioctl delete routerule recommendation-default
切分流量
将 90% 的流量给 v1,10% 的流量给 v2。
istioctl create -f istiofiles/route-rule-recommendation-v1_and_v2.yml -n istio-tutorial
执行bin/poll_customer.sh 观察访问情况。
要想动态切分流量只要修改 RouteRules 中的 weight 配置即可。
apiVersion: config.istio.io/v1alpha2kind: RouteRulemetadata:name: recommendation-v1-v2spec:destination:namespace: istio-tutorialname: recommendationprecedence: 5route:- labels:version: v1weight: 90- labels:version: v2weight: 10
因为 RouteRule 有优先级,为了继续后面的实验,在验证完成后删除该 RouteRule。
istioctl delete routerule recommendation-v1-v2 -n istio-tutorial
故障注入
有时候我们为了增强系统的健壮性,需要对系统做混沌工程,故意注入故障,并保障服务可以自动处理这些故障。
注入 HTTP 503 错误
istioctl create -f istiofiles/route-rule-recommendation-503.yml -n istio-tutorial
有 50% 的几率报 503 错误。
$ bin/poll_customer.shcustomer => preference => recommendation v2 from '77b9f6cc68-5xs27': 135customer => 503 preference => 503 fault filter abortcustomer => preference => recommendation v1 from '6fc97476f8-m2ntp': 3860customer => 503 preference => 503 fault filter abortcustomer => 503 preference => 503 fault filter abortcustomer => preference => recommendation v2 from '77b9f6cc68-5xs27': 136customer => preference => recommendation v1 from '6fc97476f8-m2ntp': 3861customer => 503 preference => 503 fault filter abortcustomer => 503 preference => 503 fault filter abortcustomer => preference => recommendation v2 from '77b9f6cc68-5xs27': 137customer => 503 preference => 503 fault filter abort
清理 RouteRule。
istioctl delete routerule recommendation-503 -n istio-tutorial
增加延迟
增加服务的访问延迟。
istioctl create -f istiofiles/route-rule-recommendation-delay.yml -n istio-tutorial
会有 50% 的几率访问 recommendation 服务有 7 秒的延迟。百分比和延迟时间可以在 RouteRule 中配置。
清理 RouteRule。
istioctl delete routerule recommendation-delay -n istio-tutorial
重试
让服务不是直接失败,而是增加重试机制。
我们下面将同时应用两条 RouteRule,让访问 recommendation 服务时有 50% 的几率出现 503 错误,并在出现错误的时候尝试访问 v2 版本,超时时间为 2 秒。
istioctl create -f istiofiles/route-rule-recommendation-v2_503.yml -n istio-tutorialistioctl create -f istiofiles/route-rule-recommendation-v2_retry.yml -n istio-tutorial
执行 bin/poll_customer.sh 我们看到一开始有些 503 错误,然后所有的流量都流向了 v2。
清理 RouteRules。
istioctl delete routerule recommendation-v2-retry -n istio-tutorialistioctl delete routerule recommendation-v2-503 -n istio-tutorial
超时
设置超时时间,只有服务访问超时才认定服务访问失败。
取消注释 recommendation/java/vertx/src/main/java/com/redhat/developer/demos/recommendation/RecommendationVerticle.java 中的下面一行,增加超时时间为 3 秒。
router.get("/").handler(this::timeout);
重新生成镜像。
cd recommendation/java/vertxmvn clean packagedocker build -t jimmysong/istio-tutorial-recommendation:v2 .docker push jimmysong/istio-tutorial-recommendation:v2
重新部署到 kubernetes。
kubectl delete -f recommendation/kubernetes/Deployment-v2.yml
因为我们重新构建的镜像使用了同样的名字和 tag,而之前在 Deployment-v2.yml 中配置的镜像拉取策略是 IfNotPresent,这样的话即使我们构建了新的镜像也无法应用到集群上,因此将镜像拉取策略改成 Always 确保每次启动 Pod 的时候都会拉取镜像。
kubectl apply -f <(istioctl kube-inject -f recommendation/kubernetes/Deployment-v2.yml) -n istio-tutorial
启用超时 RouteRules。
istioctl create -f istiofiles/route-rule-recommendation-timeout.yml -n istio-tutorial
访问 customer 服务将看到如下输出:
$ bin/poll_customer.shcustomer => 503 preference => 504 upstream request timeoutcustomer => preference => recommendation v1 from '6fc97476f8-m2ntp': 4002customer => 503 preference => 504 upstream request timeoutcustomer => preference => recommendation v1 from '6fc97476f8-m2ntp': 4003customer => 503 preference => 504 upstream request timeoutcustomer => preference => recommendation v1 from '6fc97476f8-m2ntp': 4004
清理 RouteRules。
istioctl delete routerule recommendation-timeout -n istio-tutorial
基于 user-agent 的智能路由(金丝雀发布)
User-agent 是一个字符串,其中包含了浏览器的信息,访问 https://www.whoishostingthis.com/tools/user-agent 获取你的 user-agent。
我的 user-agent 是:
Mozilla/5.0 (Macintosh; Intel Mac OS X 10_13_4) AppleWebKit/537.36 (KHTML, like Gecko) Chrome/65.0.3325.181 Safari/537.36
将所有的流量打到 v1。
istioctl create -f istiofiles/route-rule-recommendation-v1.yml -n istio-tutorial
将使用 Safari 浏览器访问的流量打到 v2。
istioctl create -f istiofiles/route-rule-safari-recommendation-v2.yml -n istio-tutorial
谁用 Safari 或者 Chrome(Chrome 浏览器的 user-agent 中也包含 Safari 字段)访问 http://customer.istio-tutorial.jimmysong.io/ 在经过 3 秒钟(我们在前面重新编译 v2 镜像,设置了 3 秒超时时间)后将看到访问 v2 的输出。
或者使用 curl 访问。
curl -A Safari http://customer.istio-tutorial.jimmysong.io/curl -A Firefox http://customer.istio-tutorial.jimmysong.io/
观察返回的结果。
将移动端用户的流量导到 v2。
istioctl create -f istiofiles/route-rule-mobile-recommendation-v2.yml -n istio-tutorialcurl -A "Mozilla/5.0 (iPhone; U; CPU iPhone OS 4(KHTML, like Gecko) Version/5.0.2 Mobile/8J2 Safari/6533.18.5" http://customer.istio-tutorial.jimmysong.io/
观察输出的结果。
清理 RouteRules。
istioctl delete routerule recommendation-mobile -n istio-tutorialistioctl delete routerule recommendation-safari -n istio-tutorialistioctl delete routerule recommendation-default -n istio-tutorial
镜像流量
确保当前至少运行了两个版本的 recommendation 服务,并且没有 RouteRule。
注:可以使用 istioctl get routerule 获取 RouteRule。
设置流量镜像,将所有 v1 的流量都被镜像到 v2。
istioctl create -f istiofiles/route-rule-recommendation-v1-mirror-v2.yml -n istio-tutorialbin/poll_customer.sh
查看 recommendation-v2 的日志。
kubectl logs -f `oc get pods|grep recommendation-v2|awk '{ print $1 }'` -c recommendation
访问控制
Istio 可以设置服务访问的黑白名单,如果没有权限的话会返回 HTTP 404 Not Found。
白名单
istioctl create -f istiofiles/acl-whitelist.yml -n istio-tutorial
此时访问 customer 服务。
$ bin/poll_customer.shcustomer => 404 NOT_FOUND:preferencewhitelist.listchecker.istio-tutorial:customer is not whitelisted
重置环境。
istioctl delete -f istiofiles/acl-whitelist.yml -n istio-tutorial
黑名单
设置黑名单,所有位于黑名单中的流量将获得 403 Forbidden 返回码。
istioctl create -f istiofiles/acl-blacklist.yml -n istio-tutorial
此时访问 customer 服务。
$ bin/poll_customer.shcustomer => 403 PERMISSION_DENIED:denycustomerhandler.denier.istio-tutorial:Not allowed
重置环境。
istioctl delete -f istiofiles/acl-blacklist.yml -n istio-tutorial
负载均衡
Kubernetes 中默认的负载均衡策略是 round-robin,当然我们可以使用 Istio 把它修改成 random。
增加 v1 的实例数。
kubectl scale deployment recommendation-v1 --replicas=2 -n istio-tutorial
持续访问 customer 服务。
bin/poll_customer.sh
保持前台输出,观察流量的行为。
应用负载均衡策略。
istioctl create -f istiofiles/recommendation_lb_policy_app.yml -n istio-tutorial
观察一段时间流量的行为后,重置环境。
istioctl delete -f istiofiles/recommendation_lb_policy_app.yml -n istio-tutorialkubectl scale deployment recommendation-v1 --replicas=1 -n istio-tutorial
速率限制
暂时不可用
断路器
当达到最大连接数和最大挂起请求数时快速失败。
将流量在 v1 和 v2 之间均分。
istioctl create -f istiofiles/route-rule-recommendation-v1_and_v2_50_50.yml -n istio-tutorial
未开启断路器的时候启动负载测试。
$ siege -r 2 -c 20 -v customer.istio-tutorial.jimmysong.ioNew configuration template added to /Users/jimmysong/.siegeRun siege -C to view the current settings in that file** SIEGE 4.0.4** Preparing 20 concurrent users for battle.The server is now under siege...HTTP/1.1 200 0.10 secs: 75 bytes ==> GET /HTTP/1.1 200 0.12 secs: 75 bytes ==> GET /HTTP/1.1 200 0.13 secs: 75 bytes ==> GET /HTTP/1.1 200 0.13 secs: 75 bytes ==> GET /HTTP/1.1 200 0.13 secs: 75 bytes ==> GET /HTTP/1.1 200 0.17 secs: 75 bytes ==> GET /HTTP/1.1 200 3.12 secs: 74 bytes ==> GET /HTTP/1.1 200 3.14 secs: 75 bytes ==> GET /HTTP/1.1 200 3.15 secs: 74 bytes ==> GET /HTTP/1.1 200 3.15 secs: 74 bytes ==> GET /HTTP/1.1 200 3.17 secs: 75 bytes ==> GET /HTTP/1.1 200 3.17 secs: 75 bytes ==> GET /HTTP/1.1 200 3.20 secs: 75 bytes ==> GET /HTTP/1.1 200 3.20 secs: 74 bytes ==> GET /HTTP/1.1 200 0.05 secs: 75 bytes ==> GET /HTTP/1.1 200 0.12 secs: 75 bytes ==> GET /HTTP/1.1 200 3.15 secs: 75 bytes ==> GET /HTTP/1.1 200 3.25 secs: 75 bytes ==> GET /HTTP/1.1 200 3.26 secs: 75 bytes ==> GET /HTTP/1.1 200 3.14 secs: 75 bytes ==> GET /HTTP/1.1 200 3.58 secs: 74 bytes ==> GET /HTTP/1.1 200 6.15 secs: 74 bytes ==> GET /HTTP/1.1 200 6.16 secs: 75 bytes ==> GET /HTTP/1.1 200 3.03 secs: 74 bytes ==> GET /HTTP/1.1 200 6.06 secs: 75 bytes ==> GET /HTTP/1.1 200 6.04 secs: 75 bytes ==> GET /HTTP/1.1 200 3.11 secs: 74 bytes ==> GET /HTTP/1.1 200 3.09 secs: 75 bytes ==> GET /HTTP/1.1 200 6.15 secs: 74 bytes ==> GET /HTTP/1.1 200 6.71 secs: 74 bytes ==> GET /HTTP/1.1 200 3.52 secs: 75 bytes ==> GET /^CLifting the server siege...Transactions: 31 hitsAvailability: 100.00 %Elapsed time: 7.99 secsData transferred: 0.00 MBResponse time: 2.99 secsTransaction rate: 3.88 trans/secThroughput: 0.00 MB/secConcurrency: 11.60Successful transactions: 31Failed transactions: 0Longest transaction: 6.71Shortest transaction: 0.05
所有的请求都成功了,但是性能很差,因为 v2 版本设置了 3 秒的超时时间。
我们启用下断路器。
istioctl create -f istiofiles/recommendation_cb_policy_version_v2.yml -n istio-tutorial
重新测试一下。
$ siege -r 2 -c 20 -v customer.istio-tutorial.jimmysong.io** SIEGE 4.0.4** Preparing 20 concurrent users for battle.The server is now under siege...HTTP/1.1 200 0.07 secs: 75 bytes ==> GET /HTTP/1.1 503 0.07 secs: 92 bytes ==> GET /HTTP/1.1 200 0.07 secs: 75 bytes ==> GET /HTTP/1.1 503 0.12 secs: 92 bytes ==> GET /HTTP/1.1 503 0.12 secs: 92 bytes ==> GET /HTTP/1.1 200 0.16 secs: 75 bytes ==> GET /HTTP/1.1 503 0.16 secs: 92 bytes ==> GET /HTTP/1.1 503 0.21 secs: 92 bytes ==> GET /HTTP/1.1 503 0.21 secs: 92 bytes ==> GET /HTTP/1.1 200 0.24 secs: 75 bytes ==> GET /HTTP/1.1 200 0.24 secs: 75 bytes ==> GET /HTTP/1.1 503 0.14 secs: 92 bytes ==> GET /HTTP/1.1 503 0.29 secs: 92 bytes ==> GET /HTTP/1.1 503 0.13 secs: 92 bytes ==> GET /HTTP/1.1 503 0.18 secs: 92 bytes ==> GET /HTTP/1.1 503 0.13 secs: 92 bytes ==> GET /HTTP/1.1 200 0.11 secs: 75 bytes ==> GET /HTTP/1.1 200 0.39 secs: 75 bytes ==> GET /HTTP/1.1 200 0.24 secs: 75 bytes ==> GET /HTTP/1.1 503 0.44 secs: 92 bytes ==> GET /HTTP/1.1 200 0.43 secs: 75 bytes ==> GET /HTTP/1.1 200 0.44 secs: 75 bytes ==> GET /HTTP/1.1 503 0.40 secs: 92 bytes ==> GET /HTTP/1.1 200 0.47 secs: 75 bytes ==> GET /HTTP/1.1 503 0.42 secs: 92 bytes ==> GET /HTTP/1.1 200 0.42 secs: 75 bytes ==> GET /HTTP/1.1 200 0.06 secs: 75 bytes ==> GET /HTTP/1.1 503 0.07 secs: 92 bytes ==> GET /HTTP/1.1 200 0.15 secs: 75 bytes ==> GET /HTTP/1.1 200 0.12 secs: 75 bytes ==> GET /HTTP/1.1 503 0.57 secs: 92 bytes ==> GET /HTTP/1.1 503 0.18 secs: 92 bytes ==> GET /HTTP/1.1 503 0.52 secs: 92 bytes ==> GET /HTTP/1.1 503 0.65 secs: 92 bytes ==> GET /HTTP/1.1 503 0.42 secs: 92 bytes ==> GET /HTTP/1.1 200 0.09 secs: 75 bytes ==> GET /HTTP/1.1 200 0.43 secs: 75 bytes ==> GET /HTTP/1.1 503 0.04 secs: 92 bytes ==> GET /HTTP/1.1 200 4.15 secs: 74 bytes ==> GET /HTTP/1.1 200 0.01 secs: 75 bytes ==> GET /Transactions: 19 hitsAvailability: 47.50 %Elapsed time: 4.16 secsData transferred: 0.00 MBResponse time: 0.72 secsTransaction rate: 4.57 trans/secThroughput: 0.00 MB/secConcurrency: 3.31Successful transactions: 19Failed transactions: 21Longest transaction: 4.15Shortest transaction: 0.01
我们可以看到在启用了断路器后各项性能都有提高。
清理配置。
istioctl delete routerule recommendation-v1-v2 -n istio-tutorial
istioctl delete -f istiofiles/recommendation_cb_policy_version_v2.yml -n istio-tutorial
Pool Ejection
所谓的 Pool Ejection 就是当某些实例出现错误(如返回 5xx 错误码)临时将该实例弹出一段时间后(窗口期,可配置),然后再将其加入到负载均衡池中。我们的例子中配置的窗口期是 15 秒。
将 v1 和 v2 的流量均分。
istioctl create -f istiofiles/route-rule-recommendation-v1_and_v2_50_50.yml -n istio-tutorial
增加 v2 的实例个数。
kubectl scale deployment recommendation-v2 --replicas=2 -n istio-tutorial
kubectl get pods -w
等待所有的 Pod 的状态都启动完成。
现在到 v2 的容器中操作。
$ kubectl exec recommendation-v2-785465d9cd-225ms -c recommendation /bin/bash
$ curl localhost:8080/misbehave
Following requests to '/' will return a 503
增加 Pool Ejection 配置。
istioctl create -f istiofiles/recommendation_cb_policy_pool_ejection.yml -n istio-tutorial
此时再访问 customer 服务。
$ bin/poll_customer.sh
customer => preference => recommendation v1 from '6fc97476f8-m2ntp': 10505
customer => preference => recommendation v2 from '785465d9cd-225ms': 2407
customer => preference => recommendation v1 from '6fc97476f8-m2ntp': 10506
customer => preference => recommendation v2 from '785465d9cd-225ms': 2408
customer => preference => recommendation v1 from '6fc97476f8-m2ntp': 10507
customer => preference => recommendation v1 from '6fc97476f8-m2ntp': 10508
customer => preference => recommendation v1 from '6fc97476f8-m2ntp': 10509
customer => 503 preference => 503 recommendation misbehavior from '785465d9cd-ldc6j'
customer => preference => recommendation v2 from '785465d9cd-225ms': 2409
customer => preference => recommendation v2 from '785465d9cd-225ms': 2410
我们看到窗口期生效了,当出现 503 错误后至少 15 秒后才会出现第二次。
即使有了负载均衡池弹出策略对于系统的弹性来说依然还不够,如果你的服务有多个可用实例,可以将断路器、重试、Pool Ejection 等策略组合起来使用。
例如在以上的 Pool Ejection 的基础上增加重试策略。
istioctl replace -f istiofiles/route-rule-recommendation-v1_and_v2_retry.yml -n istio-tutorial
现在再访问 customer 服务就看不到 503 错误了。
清理配置。
kubectl scale deployment recommendation-v2 --replicas=1 -n istio-tutorial
istioctl delete routerule recommendation-v1-v2 -n istio-tutorial
istioctl delete -f istiofiles/recommendation_cb_policy_pool_ejection.yml -n istio-tutorial
Egress
Egress 是用来配置 Istio serivce mesh 中的服务对外部服务的访问策略。
具体配置请参考控制 Egress 流量。
以下示例还有问题,无法正常工作。
构建示例镜像 egresshttpbin。
cd egress/egresshttpbin/
mvn clean package
docker build -t jimmysong/istio-tutorial-egresshttpbin:v1 .
docker push jimmysong/istio-tutorial-egresshttpbin:v1
部署到 Kubernetes。
kubectl apply -f <(istioctl kube-inject -f egress/egresshttpbin/src/main/kubernetes/Deployment.yml) -n istio-toturial
kubectl create -f egress/egresshttpbin/src/main/kubernetes/Service.yml
为了在 kubernetes 集群外部访问到该服务,修改增加 ingress 配置并修改本地的/etc/hosts 文件,我们在前面已经完成了,此处不再赘述。
构建示例镜像 egressgithub。
cd egress/egressgithub
mvn clean package
docker build -t jimmysong/istio-tutorial-egressgithub:v1 .
docker push jimmysong/istio-tutorial-egressgithub:v1
部署到 Kubernetes。
kubectl apply -f <(istioctl kube-inject -f egress/egressgithub/src/main/kubernetes/Deployment.yml) -n istio-tutorial
kubectl create -f egress/egressgithub/src/main/kubernetes/Service.yml
增加 Egress 配置。
istioctl create -f istiofiles/egress_httpbin.yml -n istio-tutorial
到 egresshttpbin 容器中测试。
kubectl exec -it $(oc get pods -o jsonpath="{.items[*].metadata.name}" -l app=egresshttpbin,version=v1) -c egresshttpbin /bin/bash

curl localhost:8080

curl httpbin.org/user-agent

curl httpbin.org/headers

exit
增加对 jimmysong.io 的 egress 配置。
cat <<EOF | istioctl create -f -
apiVersion: config.istio.io/v1alpha2
kind: EgressRule
metadata:
  name: jimmysong-egress-rule
  namespace: istio-tutorial
spec:
  destination:
    service: jimmysong.io
  ports:
    - port: 443
      protocol: https
EOF
增加 Egress 配置。
istioctl create -f istiofiles/egress_github.yml -n istio-tutorial
到 egressgithub 容器中测试。
kubectl exec -it $(oc get pods -o jsonpath="{.items[*].metadata.name}" -l app=egressgithub,version=v1) -c egressgithub /bin/bash

curl http://jimmysong:443

exit
清理环境。
istioctl delete egressrule httpbin-egress-rule jimmysong-egress-rule github-egress-rule -n istio-tutorial
参考
- https://github.com/redhat-developer-demos/istio-tutorial
- Book - Introducing Istio Service Mesh for Microservices
