 我的书签
我的书签
 添加书签
添加书签 移除书签
移除书签- 实现服务的消费者
- 开发环境
- 更改配置
- 声明式 REST 客户端——Feign
- 一个最简单的 Feign
- 如何测试
- 源码
实现服务的消费者
本章节,我们将创建一个micro-weather-feign 作为服务器的消费者,并演示如何使用 Feign 来消费服务。
在 micro-weather-eureka-client 的基础上稍作修改即可。
开发环境
- Gradle 4.0
- Spring Boot 2.0.0.M3
- Spring Cloud Netflix Eureka Client Finchley.M2
- Spring Cloud Starter OpenFeign Finchley.M2
更改配置
增加如下配置:
dependencies {//...compile('org.springframework.cloud:spring-cloud-starter-openfeign')//...}
声明式 REST 客户端——Feign
Feign 是一个声明式的 Web 服务客户端。这使得Web服务客户端的写入更加方便。它具有可插拔注释支持,包括Feign注释和JAX-RS注释。Feign还支持可插拔编码器和解码器。Spring Cloud增加了对Spring MVC注释的支持,并且使用了在Spring Web中默认使用的相同的HttpMessageConverter。 在使用Feign时,Spring Cloud集成了Ribbon和Eureka来提供负载平衡的http客户端。
一个最简单的 Feign
主应用:
@SpringBootApplication@EnableDiscoveryClient@EnableFeignClientspublic class Application {public static void main(String[] args) {SpringApplication.run(Application.class, args);}}
编写 Feign 请求接口:
package com.waylau.spring.cloud.service;import org.springframework.cloud.netflix.feign.FeignClient;import org.springframework.web.bind.annotation.RequestMapping;import org.springframework.web.bind.annotation.RequestMethod;/*** Hello Client** @since 1.0.0 2017年9月17日* @author <a href="https://waylau.com">Way Lau</a>*/@FeignClient("micro-weather-eureka-client")public interface HelloClient {@RequestMapping(method = RequestMethod.GET, value = "/hello")String getHello();}
其中:@FeignClient指定了要访问的服务的名称“micro-weather-eureka-client”。
项目配置:
spring.application.name: micro-weather-feigneureka.client.serviceUrl.defaultZone: http://localhost:8761/eureka/feign.client.config.feignName.connectTimeout: 5000feign.client.config.feignName.readTimeout: 5000
如何测试
编写测试用例:
@RunWith(SpringRunner.class)@SpringBootTestpublic class HelloClientTest {@Autowiredprivate HelloClient helloClient;@Testpublic void testHello() {String hello = helloClient.getHello();System.out.println(hello);}}
启动在之前章节中搭建的 micro-weather-eureka-server 和 micro-weather-eureka-client 两个项目。这样, micro-weather-eureka-client服务,就能被 micro-weather-feign 发现,并进行访问。
启动测试用例,如果一切正常,可以在控制台看到“Hello world”字样。这个就是请求micro-weather-eureka-client 服务时响应的内容。
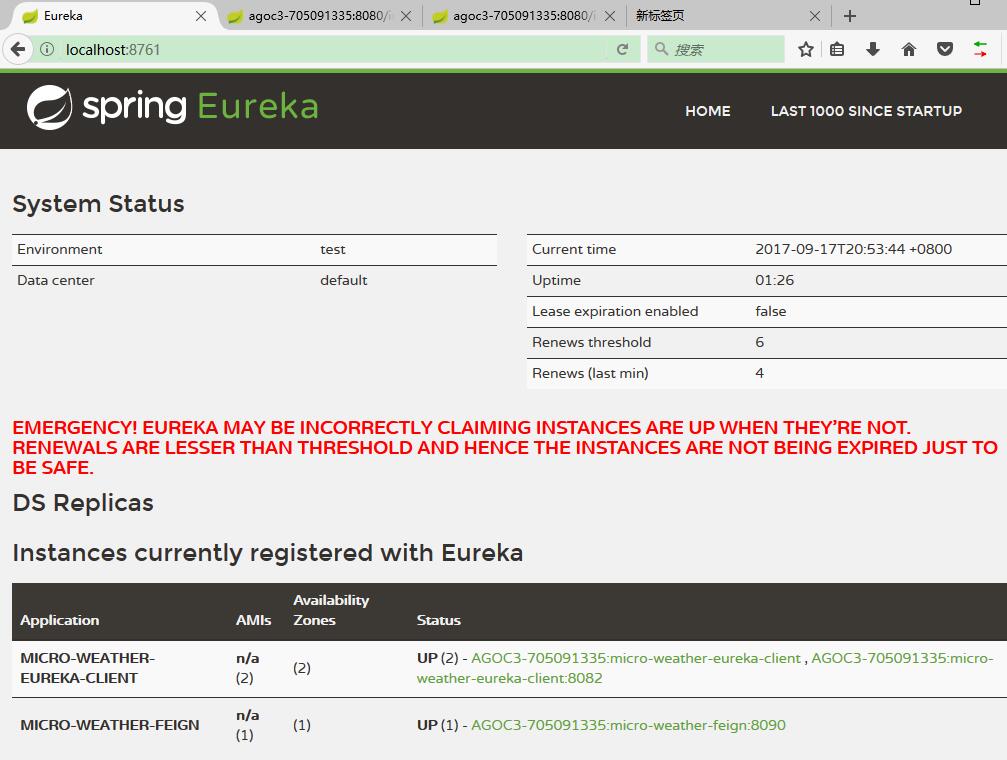
如果同时也启动了 micro-weather-feign 项目,则能在
启动在之前章节中搭建的 micro-weather-eureka-server 管理界面,看到这个服务的信息。
源码
本章节源码,见micro-weather-feign 。
