 我的书签
我的书签
 添加书签
添加书签 移除书签
移除书签- 04-Web Form
- 结构优化
- 用户登录表单
- 接收表单数据
- 表单后端验证
- Links
04-Web Form
上两章我们讨论了Template,本章节我们继续讨论 Web 表单
Web表单是所有Web应用程序中最基本的组成部分之一。 本章我们将使用表单来为用户发表动态和登录认证提供途径。
本章的GitHub链接为 Source, Diff,
Zip
结构优化
上一章我们通过 模板继承 以及 PopulateTemplates 对 templates 文件夹进行了梳理,在继续开始Web表单之前,我们再来梳理下其中 Go 代码的结构。
目前我们的所有的逻辑都集中在了 main.go 文件里,包括 model struct, viewmodel struct 定义,还有 handler 的实现,对于小点的web应用程序,可能这有助于快速开发,不过随着项目的扩大,代码量会变得越来越多,越来越臃肿,最后甚至会影响到阅读代码。这个时候结构的优化就显得尤为重要了。
我们的思路是 建立这样的数据结构:
- package model - 负责数据建模(以及后一章 数据库 ORM)
- package vm - 负责View Model
- package controller - 负责 http 路由
每个文件夹下的 g.go 负责存放该package的全局变量 以及 init 函数。( 只能说 类似 Python 的 __init__.py, 因为 Go 其实是通过大小写来表明是否可以外部引用, 不像Python,一定要 import 到 __init__.py 文件里才能通过 package 名来引用。)
我们先建立model 文件夹,然后将 Post、User struct 分别移到 model 文件夹下
model/user.go
package model// User structtype User struct {Username string}
model/post.go
package model// Post structtype Post struct {UserBody string}
再将 view model 移到 vm文件夹下
vm/g.go
package vm// BaseViewModel structtype BaseViewModel struct {Title string}// SetTitle funcfunc (v *BaseViewModel) SetTitle(title string) {v.Title = title}
由于_base.html 基础模板中有 Title 字段,所以 Title是每个view都必有的字段,我们将它单独设成个 BaseViewStruct,方便用 匿名组合;
vm/index.go
package vmimport "github.com/bonfy/go-mega-code/model"// IndexViewModel structtype IndexViewModel struct {BaseViewModelmodel.UserPosts []model.Post}// IndexViewModelOp structtype IndexViewModelOp struct{}// GetVM funcfunc (IndexViewModelOp) GetVM() IndexViewModel {u1 := model.User{Username: "bonfy"}u2 := model.User{Username: "rene"}posts := []model.Post{model.Post{User: u1, Body: "Beautiful day in Portland!"},model.Post{User: u2, Body: "The Avengers movie was so cool!"},}v := IndexViewModel{BaseViewModel{Title: "Homepage"}, u1, posts}return v}
将所有的路由相关移到controller
utils.go存放 辅助工具函数,一般都是本package引用,所以小写就可以了, 这里PopulateTemplates 函数其实最好是小写,不过不去管它了。
controller/utils.go
package controllerimport ("html/template""io/ioutil""os")// PopulateTemplates func// Create map template name to template.Templatefunc PopulateTemplates() map[string]*template.Template {const basePath = "templates"result := make(map[string]*template.Template)layout := template.Must(template.ParseFiles(basePath + "/_base.html"))dir, err := os.Open(basePath + "/content")if err != nil {panic("Failed to open template blocks directory: " + err.Error())}fis, err := dir.Readdir(-1)if err != nil {panic("Failed to read contents of content directory: " + err.Error())}for _, fi := range fis {f, err := os.Open(basePath + "/content/" + fi.Name())if err != nil {panic("Failed to open template '" + fi.Name() + "'")}content, err := ioutil.ReadAll(f)if err != nil {panic("Failed to read content from file '" + fi.Name() + "'")}f.Close()tmpl := template.Must(layout.Clone())_, err = tmpl.Parse(string(content))if err != nil {panic("Failed to parse contents of '" + fi.Name() + "' as template")}result[fi.Name()] = tmpl}return result}
controller/g.go
package controllerimport "html/template"var (homeController hometemplates map[string]*template.Template)func init() {templates = PopulateTemplates()}// Startup funcfunc Startup() {homeController.registerRoutes()}
controller/home.go
package controllerimport ("net/http""github.com/bonfy/go-mega-code/vm")type home struct{}func (h home) registerRoutes() {http.HandleFunc("/", indexHandler)}func indexHandler(w http.ResponseWriter, r *http.Request) {vop := vm.IndexViewModelOp{}v := vop.GetVM()templates["index.html"].Execute(w, &v)}
这里将 匿名函数 实名成 indexHandler,并将所有的构造 indexviewmodel 的逻辑全部移到了 vm/index.go 中的 GetVM 方法里
最终我们的结构优化成了下图的树状结构,这样有利于我们以后的扩展。
go-mega-code├── controller│ ├── g.go│ ├── home.go│ └── utils.go├── main.go├── model│ ├── post.go│ └── user.go├── templates│ ├── _base.html│ └── content│ └── index.html└── vm├── g.go└── index.go
本小节 Diff
用户登录表单
在将整个项目优化结构之后,我们建立登陆表单就非常简单了。
按照 index 的做法,login表单 我们其实需要,一个 template, 一个 vm, 以及一个 handler(其实后面基本上所有的加页面的做法也是类似)
templates/_base.html
...<div>Blog:<a href="/">Home</a><a href="/login">Login</a></div>...
templates/content/login.html
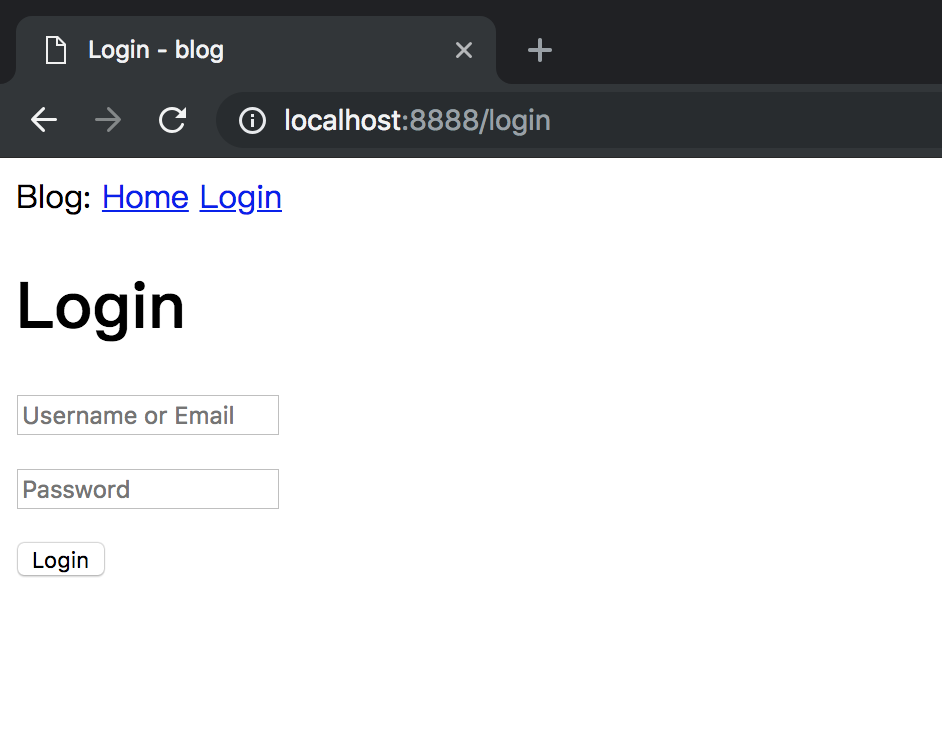
{{define "content"}}<h1>Login</h1><form action="/login" method="post" name="login"><p><input type="text" name="username" value="" placeholder="Username or Email"></p><p><input type="password" name="password" value="" placeholder="Password"></p><p><input type="submit" name="submit" value="Login"></p></form>{{end}}
login.html 还是继承 _base.html 只要关注 content 的内容就行了
vm/login.go
package vm// LoginViewModel structtype LoginViewModel struct {BaseViewModel}// LoginViewModelOp strutctype LoginViewModelOp struct{}// GetVM funcfunc (LoginViewModelOp) GetVM() LoginViewModel {v := LoginViewModel{}v.SetTitle("Login")return v}
这里 v.SetTitle 就是用了 匿名组合 的特性,继承了 BaseViewModel 的 SetTitle 方法
controller/home.go 中加入 loginHandler
controller/home.go
func (h home) registerRoutes() {...http.HandleFunc("/login", loginHandler)}...func loginHandler(w http.ResponseWriter, r *http.Request) {tpName := "login.html"vop := vm.LoginViewModelOp{}v := vop.GetVM()templates[tpName].Execute(w, &v)}...
此时,你可以验证结果了, 运行该应用,在浏览器的地址栏中输入 http://localhost:8888/然后点击顶部导航栏中的Login链接来查看新的登录表单。
本小节 Diff
接收表单数据
目前我们点击 Login 按钮,页面发现没有变化,其实我们后台还是接收到了这个请求,只是依然返回的是这个页面,接下来我们要对POST请求和GET请求分别做处理。
controller/home.go
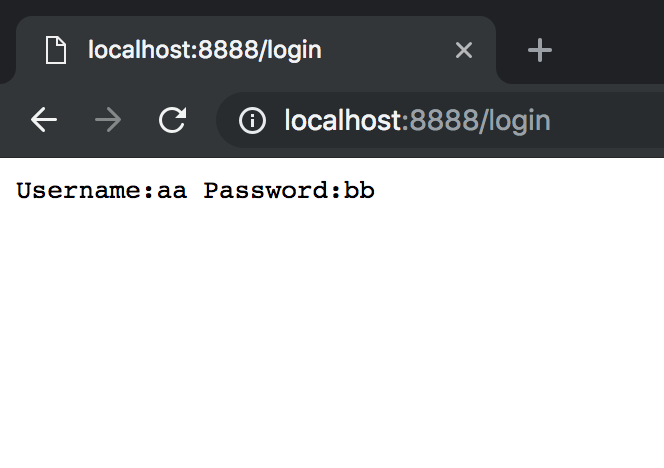
...func loginHandler(w http.ResponseWriter, r *http.Request) {tpName := "login.html"vop := vm.IndexViewModelOp{}v := vop.GetVM()if r.Method == http.MethodGet {templates[tpName].Execute(w, &v)}if r.Method == http.MethodPost {r.ParseForm()username := r.Form.Get("username")password := r.Form.Get("password")fmt.Fprintf(w, "Username:%s Password:%s", username, password)}}
Tip: html 中的form submit 是 Post 方法,简单说明下,不过相信大家都懂
修改 loginHandler 对 MethodGet 和 MethodPost 分别处理,MethodPost 接受 form post,运行后在login页面输入用户名、密码 点击Login,显示结果
本小节 Diff
表单后端验证
表单验证分为服务器前端验证 与 后端验证,比如验证 输入字符个数、正则匹配等,一般来说 用户名密码正确性检查只能在后端验证,其它前后端验证都可以,不过为了减少服务器压力与加强用户体验,字符长度等检查 一般放在前端做检查。
由于本教程主要是 Go 后端 web教程,这里简单的做一个 后端检查 的示例
LoginModelView里加入 Errs 字段,用于输出检查的错误返回
vm/login.go
...type LoginViewModel struct {BaseViewModelErrs []string}// AddError funcfunc (v *LoginViewModel) AddError(errs ...string) {v.Errs = append(v.Errs, errs...)}...
login.html 中加入判断是否有错误,以及错误输出
templates/content/login.html
...{{if .Errs}}<ul>{{range .Errs}}<li>{{.}}</li>{{end}}</ul>{{end}}...
controller/home.go
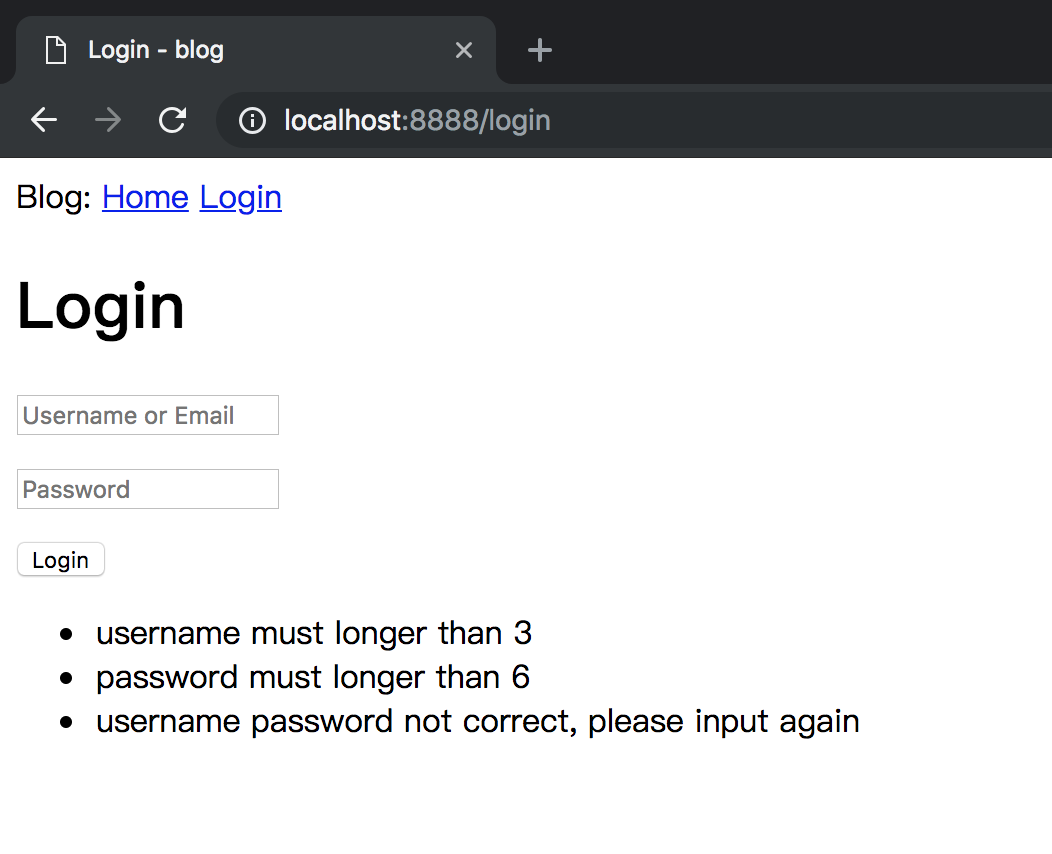
...func check(username, password string) bool {if username == "bonfy" && password == "abc123" {return true}return false}func loginHandler(w http.ResponseWriter, r *http.Request) {tpName := "login.html"vop := vm.LoginViewModelOp{}v := vop.GetVM()if r.Method == http.MethodGet {templates[tpName].Execute(w, &v)}if r.Method == http.MethodPost {r.ParseForm()username := r.Form.Get("username")password := r.Form.Get("password")if len(username) < 3 {v.AddError("username must longer than 3")}if len(password) < 6 {v.AddError("password must longer than 6")}if !check(username, password) {v.AddError("username password not correct, please input again")}if len(v.Errs) > 0 {templates[tpName].Execute(w, &v)} else {http.Redirect(w, r, "/", http.StatusSeeOther)}}}
再次运行,在login页面随便输入用户名密码,如果不符合规范,就会有后端验证提示你重新输入。
本小节 Diff
Notice: 显示 Error , Flask-Mega 教程里面用的是 flash (flash-messages),我们这边是将错误信息直接 render 到了页面上,其实也是可以用 flash 的,不过 Go 的 Session 目前没有特别好的第三方插件,我们现在还没有用到第三方包,就用了原生的渲染。后续集成Session之后会有例子用到flash。先在此说明下,耐心往下看。
Links
- 目录
- 上一节: 03-Template-Advance
- 下一节: 05-Database
